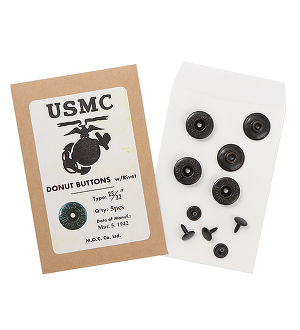
How to attach USMC Donut Buttons
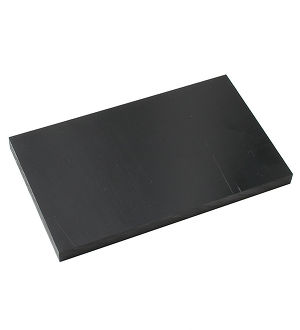
Place the cloth on a rubber board, etc., and punch a 2 mm diameter hole at the button mounting position.
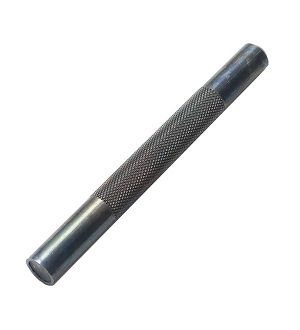
Place the Base Tool on a rubber board, etc., and insert the Button to the cylinder top of the Base Tool.
Note) Refer to the Figure 2
Insert the rivet into the center of the button through a 2 mm diameter hole punched at the cloth.
Note) When driving rivets into buttons, use a rubber board, etc., as it requires moderate hardness.
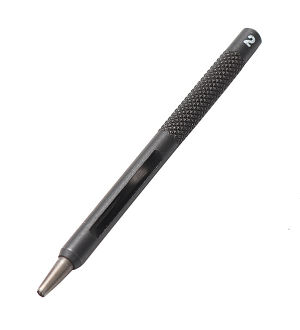
Apply the tip of the Hand Press Stick to the Rivet head and lightly hit the head of the Hand Press Stick 2-3 times with a plastic hammer (or a hammer), after confirming that the Rivet has been driven correctly, hit it 3-4 times slightly stronger .
Note-1) Make sure that the Rivet head fits in the edge around the tip of the Hand Press Stick.
Note-2) Slightly larger plastic hammer is suitable for driving Rivets into Buttons with a certain level of strength without damaging the object. If not, use a metal hammer.
Lift the button from the Base Tool and make sure the rivet center crushing is done correctly. Turn the button with your fingertips to check if it is properly attached, and you are done.
Note-1) Repeat step 4), if the Button can be turned easly with your fingertips.
Note-2) Avoid over-driving. If you hit too strong, the button will be deformed and damaged.