· Please read this explanation carefully before your transcription.
The heat process transfer decal introduced here was reproduced from the original decal as faithfully as possible which was developed by the U.S. military in 1942 and provided to the each flight clothing manufacturers. Instead of the transfer method using the flight clothing manufacturer's dedicated thermal transfer machine, the transfer method using the iron around you is introduced on the website and sold with instructions. But if the temperature setting, pressure setting, transfer time setting, etc. are not good enough or due to any carelessness transcription failure may occur at times. In addition, this decal is exclusively for cloth(not for leather), and the target cloth is 100% cotton cloth same type as used in the US military in the 40's and 50's and nylon cloth used in the USAF after that. It is not suitable for transfer to the fabrics coated at the surface, dirty fabrics, uneven fabrics, and polyester fabrics. There are various possible cases of transfer failures, but please note that we cannot guarantee for the loss of clothing due to failure and re-sending the decals due to the decal transfer failure.
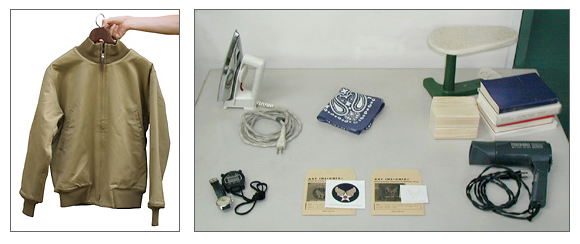
- Small iron
- Wood board into which the sleeve can be put, or small ironing table
- Cotton pad, unpiled cotton meterial ( * )
- Wrist watch with a timer or secondhand.
Before starting work
It is desirable that the clothes to print the insignia on should be clean. The clothes should be dry-cleaned if extremely dirty.
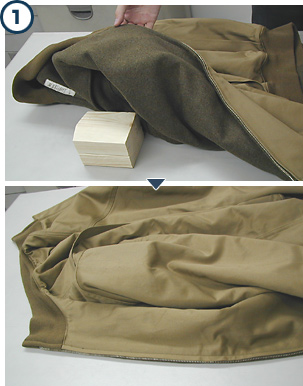
Put wood board or small ironing table under the left sleeve.
Get better result if you heat up position where decal will apply by hair dryer before transfer.
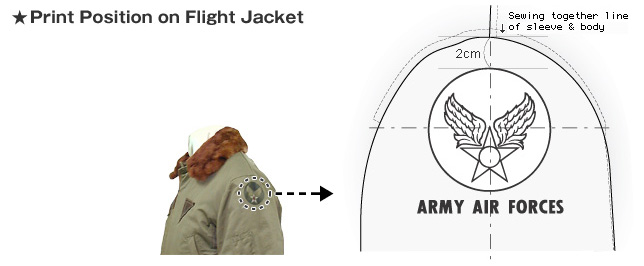
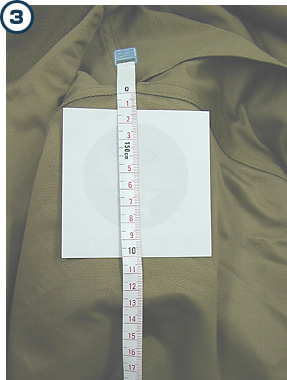
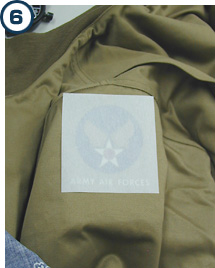
Peel off the protective paper on the ink side of the insignia. Put the insignia so that its top can be printed about 1 inch from the seam of the left shoulder and its ink surface comes in contact with the textile.
It is desirable that the clothes to print the insignia on should be clean. The clothes should be dry-cleaned if extremely dirty.
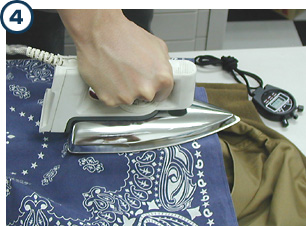
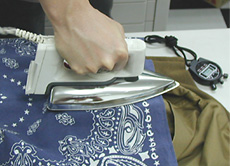
Put the iron on the cotton pad gently from above. At this time, never move the iron back and forth. Start press-fitting at the print position. It takes 12 to 18 seconds to press-fit the insignia perfectly. Then remove the iron from the cotton pad. Sometimes, the cotton pad itself may be tightly press-fitted as well because of heat.
The recommended iran temperature range is 150degrees C. to 170 degrees C.. If you have an iron with a temperature controller, set it at the position of the "Middle of Regular and High Temperature" position. No steam iron is needed.
The recommended pressure for ironing is about 300g/cm square.
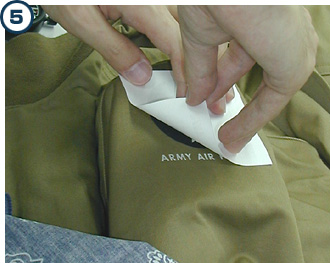
Also, peel off the backing of the insignia gradually. At this time, check the insignia for perfect printing. If the printing is not perfect enough (if the insignia is printed partially or if the ink is not colored enough as a whole), return the backing to the original position and press-fit again.
When the printing is finished completely, peel off the backing.
Repeat press fitting until you are satisfied with the printing.
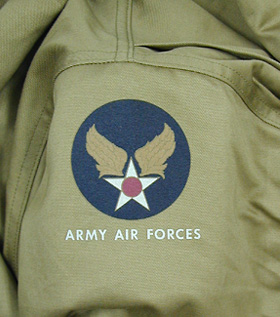
Then hang the clothes on a hanger and leave until the clothes cool down and the ink permeates their textile.
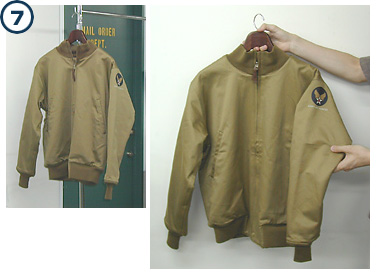
Every procedure has been completed when the clothes cool down.